
Sunday, December 9, 2012
THE wallpaper to be
Today I found out the what's going to be the wallpaper for the living room wall that we're redoing next year: Kiku by Romo. I really hope that it's still possible to get it somewhere. Tomorrow I'll find out how I'll get it. Good luck for me! :)

Tuesday, December 4, 2012
Cross-Stiching Nerd wishes Happy Christmas
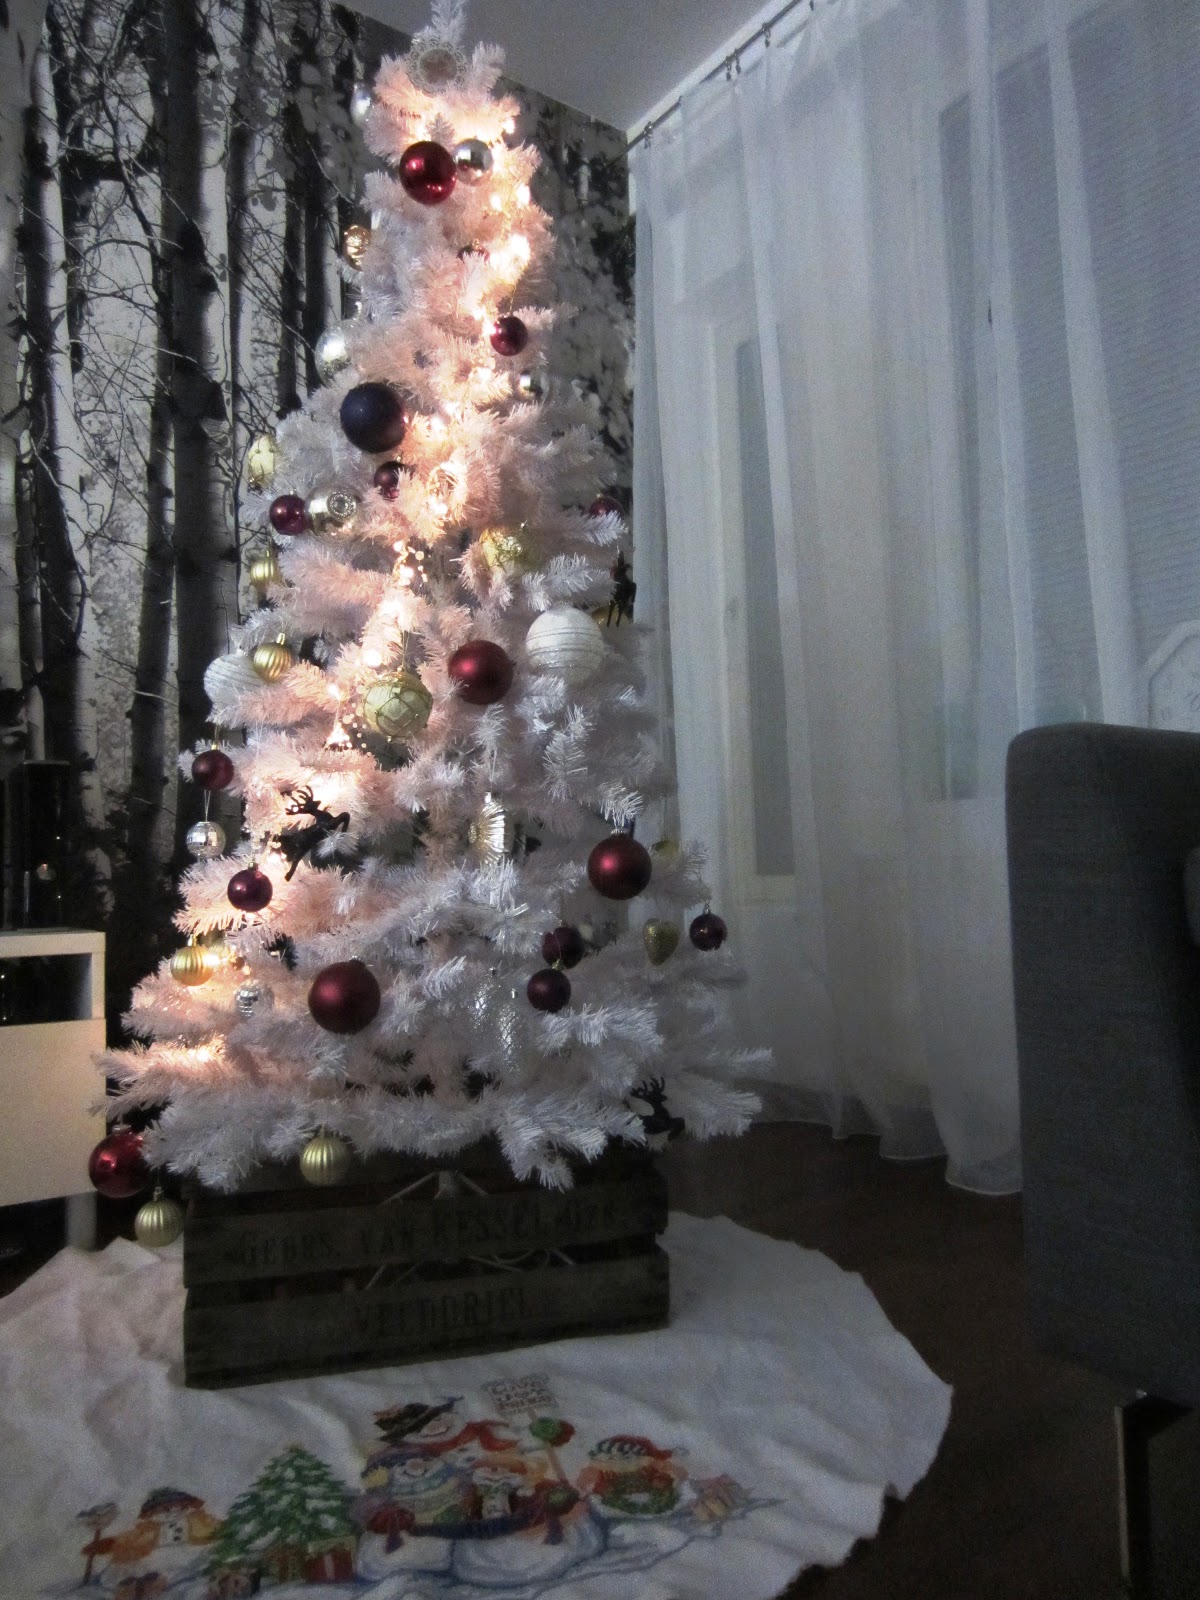
Today I finally finished my huge cross-stiching under-the-christmas-tree-mat! I've been doing it on-off for a couple of years now but about a month ago I decided to finally finish it so that I don't find it under the bookshelf still 5 years from now!

I'm a huge cross-stiching nerd and previously I've made a tower with a very gorgeous floral tribal decoration on the bottom. Sounds gay, but I gave it to my dad as a present and he's kept it in the kitchen for everyone to see since :) And this year he gets a little big bigger thing for Christmas. I hope with a hand-made gift like this he'll forgive me for traveling to Bali and Singapore for the holidays :D
I hope one day I'll get to make a huge pile of presents on this mat too, but this year my family in the north can do that for me.

A lot of times when a friend has called me in the past month and asked me what I was doing, the answer was typically "mummoilen" which means something like "grannying" in English. Doing grandma stuff :) And I'm 25!
But what can I say, grannying makes me happy. And I'd be happy to hear about a new hobby now that I think I'll have a at least 10 year brake from cross-stiching. I need something to do while watching TV. Make I restart making clothes.
Thursday, November 29, 2012
Pill Mani
No, I was not taking any pills while doing this manicure, nor was I inspired by pills. What this manicure turned out to remind me, is a colorful pill, hence the name :)


After applying Smolder, I took the stickers away and applied Mavala's Top Coat Fixator and voil'a, the pill manicure is ready :D
Next time when I play with the stickers, I'll try a trio, let's see which three colors there will be.
Or maybe just 2 colors: white and blue for the Finnish Independence Day next thursday :)
Have a great weekend everybody! Kisses!


First I started with Essies Ole Caliente as base color. Ole Caliente is a beautiful pink coral color, shows way too peachy in the picture compared to the reality actually.

Then I cut round sticker to half. The stickers I just ordered from Staples while I was ordering other office supplies too. But I'm sure small round stickers can be found everywhere.

Then I covered the lower half of nails with the sticker:

After stickering the nails, I applied Orly's Smolder to the upper half of nails. Smolder is my favourite nailpolish shade for the autumn/winter of 2012 because of it's metallic shine.

After applying Smolder, I took the stickers away and applied Mavala's Top Coat Fixator and voil'a, the pill manicure is ready :D
Next time when I play with the stickers, I'll try a trio, let's see which three colors there will be.
Or maybe just 2 colors: white and blue for the Finnish Independence Day next thursday :)
Have a great weekend everybody! Kisses!
Wednesday, November 28, 2012
Little Free Library
What makes me happier than cosmetics, is books. I read constantly and normally I have 2-3 books I'm reading: one in the morning, one in the bus and one when I go to sleep.
I normally buy books second hand and then recycle them again by giving them away. Today I ran into a picture that melted my heart and made me think of one day having a free library too!

Here's some more information about the original Little Free Library.
This idea makes me 100% happy :)
I normally buy books second hand and then recycle them again by giving them away. Today I ran into a picture that melted my heart and made me think of one day having a free library too!

Here's some more information about the original Little Free Library.
This idea makes me 100% happy :)
Monday, November 19, 2012
Orly Fired Up -collection
After getting a huge amount of compliments while wearing Orly's Rage nailpolish, I decided I'd try their other metallic polishes too. First I thought of getting the normal sized red called Flicker, but then noticed that there's a mini collection where there's a purple and a gold one too so I thought 'Shut up and take my money':


And there was also one non-metallic one, Rapture, which I wasn't so into, but hey, it can't do no harm to have another dark one. As the winter gets darker and darker, I might just as well follow it with matching nails.
Here are some swatches, in the order of how much I like them:
1. SMOLDER


2. FLICKER (turned out to look so much more orange than in their official swatch picture of it)


3. FLARE


4. RAPTURE (More like the opposite of rapture if you ask me. Look at the color: muddy and dark brown. Rapture?! Please.)


Overall, I really like the Smolder one, and propably will buy the normal sized bottle some day. I give a happy 10 points for it, but some sad grade for the rest of them in the collection.
This collection is not worth buying if you ask me. Just pick something you really like if you know what you like.
Saturday, November 17, 2012
Office girl's LUSH must-haves: Maple Taffy & Lemony Flutter
Welcome on my desk, where I spend my 9-to-5's with mo Moominhouse mausepad and my Lush jars :)
My favourite small things to do during the day is to have a short brake every once in a while and pamper my lips, hands and cuticles. Lips are pampered with the Maple Taffy lip balm and cuticles with Lemony Flutter.
Maple Taffy is a nice lip balm with a sweet and yummy scent that makes me want to eat it every single time I open the little jar. It also blends well and feels nicely moisturizing for quite a while on the lips. One minus is that the texture is not really smooth and it tends to leave weird small pieces of balm chunks on the lips so I recommend checking the mirror after applying it if you don't wanna look like you have food stuck on your lips.
 Lemony Flutter is a really strong scented, very very rich textured cream for dry cuticles. I love the moisturizing feeling it gives my dry fingertips, but now that I look at my cuticles at home, I see that they are in a bad shape, so that makes me wonder if the Lemony Flutter actually does anything. Shouldn't it make my cuticles better? Yes, it should. But am I totally addicted to Lemony Flutter regardless of what I just complained? Yes, I am.
When I'm out of that stuff, I'll try another brand and see if there's a difference in the result of the usage. Or are they all just designed to give a reliefing feeling as first-aid moisture for very dry skin?
Just like a facial moisturizer, I never see big differences in the actual quality, it's enough that I get the moisturized feeling on my skin after washing it, but pretty much all the moisturizers in the world do that in some way. I guess that's the reason why I use the cheapest basic lotion from the pharmacy. The one you can use on any kind of skin from the moment you are born until you're taking your last breath. I've spent hundreds of euros to waste while trying different moisturizers and thinking that the price means quality as it normally does, but not when it comes to my favourite moisturizer. Makeup is a totally different story! :)
And back to cuticle creams: If anyone knows a good cuticle cream, I'm open for suggestions! And when it comes to Lemony Flutter, I'm not really sure if I'd recommend it. The scent is very strong and it's very greasy, so I have to keep in mind not to touch any important documents in a while after applying it to avoid greasy fingerprints.
Have a nice weekend, everyone!

My favourite small things to do during the day is to have a short brake every once in a while and pamper my lips, hands and cuticles. Lips are pampered with the Maple Taffy lip balm and cuticles with Lemony Flutter.
Maple Taffy is a nice lip balm with a sweet and yummy scent that makes me want to eat it every single time I open the little jar. It also blends well and feels nicely moisturizing for quite a while on the lips. One minus is that the texture is not really smooth and it tends to leave weird small pieces of balm chunks on the lips so I recommend checking the mirror after applying it if you don't wanna look like you have food stuck on your lips.

When I'm out of that stuff, I'll try another brand and see if there's a difference in the result of the usage. Or are they all just designed to give a reliefing feeling as first-aid moisture for very dry skin?
Just like a facial moisturizer, I never see big differences in the actual quality, it's enough that I get the moisturized feeling on my skin after washing it, but pretty much all the moisturizers in the world do that in some way. I guess that's the reason why I use the cheapest basic lotion from the pharmacy. The one you can use on any kind of skin from the moment you are born until you're taking your last breath. I've spent hundreds of euros to waste while trying different moisturizers and thinking that the price means quality as it normally does, but not when it comes to my favourite moisturizer. Makeup is a totally different story! :)
And back to cuticle creams: If anyone knows a good cuticle cream, I'm open for suggestions! And when it comes to Lemony Flutter, I'm not really sure if I'd recommend it. The scent is very strong and it's very greasy, so I have to keep in mind not to touch any important documents in a while after applying it to avoid greasy fingerprints.
Have a nice weekend, everyone!
Friday, October 12, 2012
Ombre manicure, Hombre, Ole Caliente!

Inspired by ombre nails done like here, I wanted to try myself!
I used Lumene base&top coat polish as the base, Lumene's Groove (just basic orange) as the base color and Essie Ole Caliente (neonish dark pink) on the tip.

The ombre style is quite easy to make with basic makeup sponge and couple of nail polishes, q-tips and nailpolish remover.

Step 1
Apply base coat that helps the nail polish stay longer and protects the nail from discoloration etc.Step 2
Apply 1 layer of base color of your choice. My opinion is that a lighter color looks better on the root of nail and a darker color better on the tip half of the nail. So apply the color you want to be closer to the root of the nail first. I have this cute little orange matte nail polish from Lumene's Natural Code line.
Step 3
Apply your base color and the tip color on a sponge as two lines that can overlap a little bit but be careful not to get the other color to the other's bottle :) I also tried to mix the colors a little with a toothpick but I would as well skip that and just go ahead pressing the nails with the sponge.
Step 4
Press the sponge on the nail so that the line between the colors is about in the middle. Go through all the nails once and let dry. I found out that after some pressings the sponge would start getting bad and small parts of the sponge would stick to the fresh nail polish. So it's good to change the part of sponge every once in a while and apply the colors again always to a fresh place on the sponge. One sponge was totally enough for me for the whole manicure. You can cut off used parts to make it easier to find new clean flat surface.
Step 5
Let them dry. And let them dry well! :D
Step 6
Go through the nails again with the same technique, this time concentrating on getting the line between the colors into a little bit different part so the line becomes blurry. I carefully dabbed the same nail a couple of times to get it blurry enough. Just make sure you don't mess up the lower layers now!
Step 7
Remove the mess from around your nails with q-tips and nailpolish remover. I use Mavala nailpolish remover, which is actually not the best... I prefer a Finnish brand Mirame when it comes to nail polish removers, but I decided to try a new one. FAIL.
Step 8
Apply a top coat to get them nails smoothed and shiny! I use the Mavala Top Coat Fixator for this, which is a pretty good choice.
Step 9
Clean up...
And RELAX, it's Friday night!
At least nails ready to party :)
Thursday, October 11, 2012
Happytarism Overload - Nature's Treats
This week has been a very very happy week for the nutritionist-happytarist-me :)
Well, actually it started last week when we picked up pears from almost our backyard. These small yummy yummy pears are super tasty juicy and totally free! Today I found some perfect ones again. The trees are on my way to work so it's easy to just pick them when you go by. Today I might have looked like a maniac because I ended up shaking one of the trees to get the last couple of pears that weren't yet on the ground :D
"Hi, neighbours! I just really really gotta get these fruits! Otherwise I'll starve because all my money goes to cosmetics...!"

After going crazy with the pear trees, I realized after a long time that outdoor air is the best blush there can ever be! The healthy redness from the crisp autumn weather compliments any face if you ask me :) Plus I realized that my hat and my earphones are the same color by accident :)

The happiness continued on tuesday when my colleague brought be a huge bag full of mushrooms that her friend had picked last weekend! So earlier this week I made a pie and today I made pasta sauce from them <3

In the picture below I'm going through the mushrooms so that no extra pine needles, spiders or other forest creatures will end up in my food :D
AND today my other colleague brought me apple jam made from his apples and cooked by his wife! I can only love love love autumn and the harvesting season. The food is organic and more ecological than any other food, because it's from own backyards and close forests. Even though I live in a city with mostly buildings next to buildings and concrete, it's lovely to be treated by the nature and most of all my friends like this.
Free organic near food that tastes beyond describingly good: 10+ Happytarist Points
Tuesday, October 9, 2012
MAC Made My Makeup
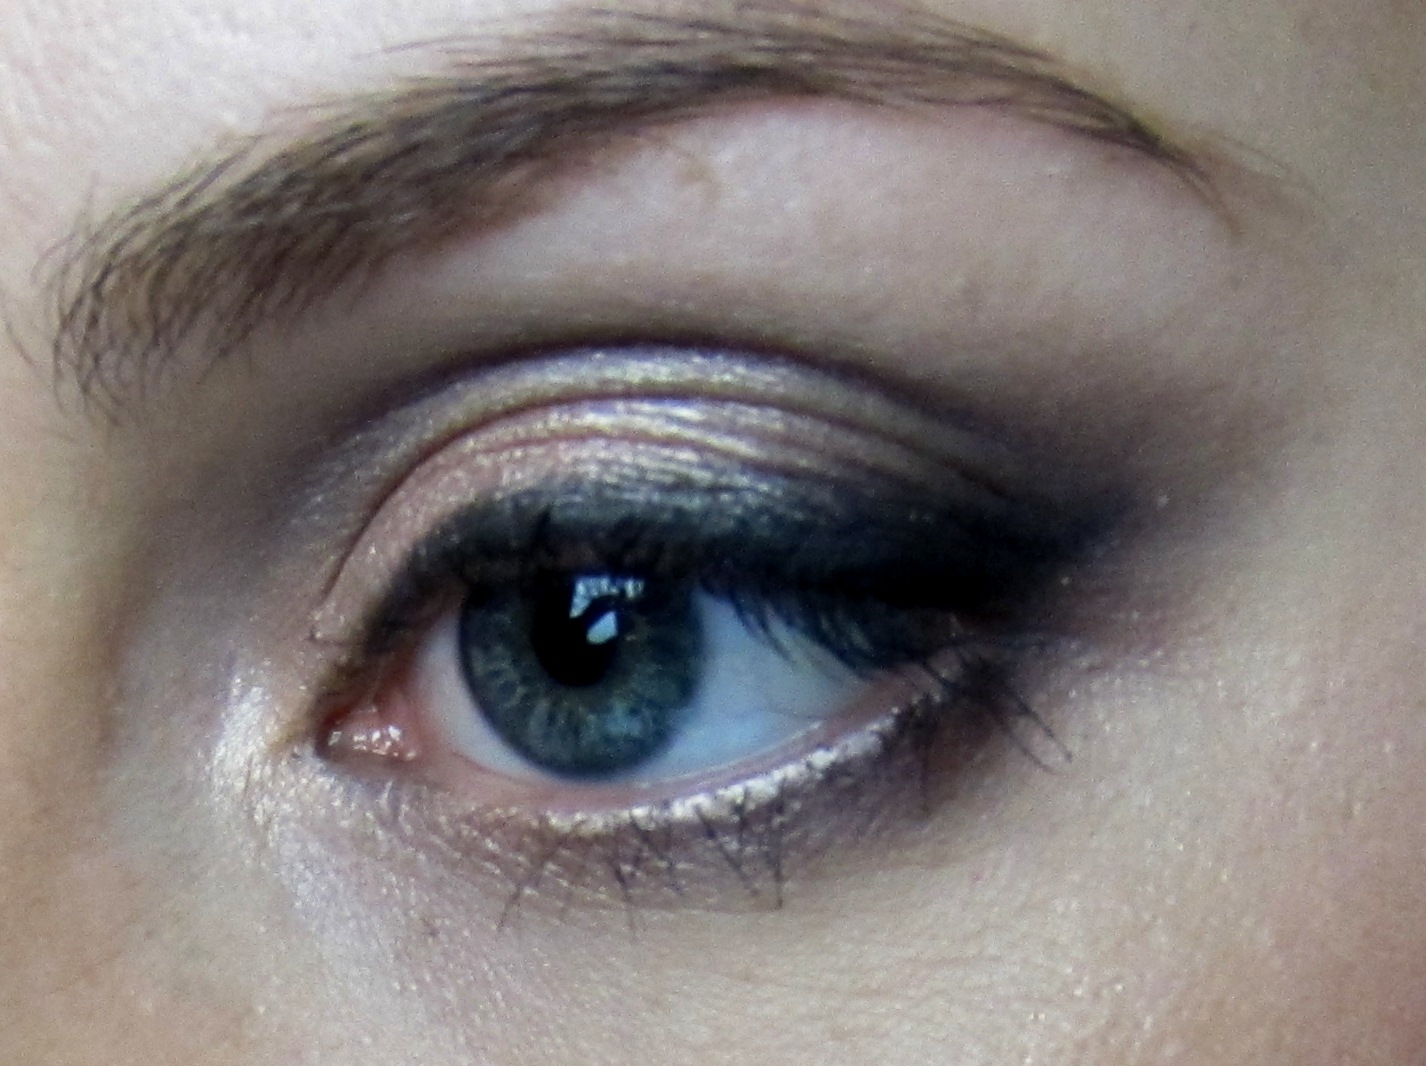
Yestrday, for the first time in my life, I went to a makeup, just sitting there and having the nicest woman doing my makeup for me. It was just a normal monday evening otherwise, but this made it unique for me. My mom is a cosmetologist and a professional makeup artist but she has never done makeup for me, just dabbed a little Joe Blasco on my red face after a facial. So I was very to try this the first time! I was sure I'd learn a lot new and I did. She asked me what I want and I told her to choose everything herself, but make it more evening look than daytime look.

Here's all the stuff she used. First she started with removing my makeup and moisturizing my face, which was interesting because honestly I had no idea that MAC also has skin care items like moisturizers. Then she primed my face with 'Face protect' primer (with SPF 50!) and applied some tinted moisturizer in color medium. Into the moisturizer she mixed Lustre drops to make the skin more glowy and a tiny bit "metallical", because this makeup was a night-life inspired look.

As eyeshadow primer she used Paintpot (don't remember the name, but it's the most natural matte one). The eyeshadows she used:
- All That Glitters
- Satin Taupe
- Black Tide.

The eye shadow part was especially interesting because she taught me how to create the openness and depth to the eyes in a way I didn't know about.First of all: I always had the wrong kind of brush for the darker colors. Second: I had always put the darker colors too low. I didn't think they'd actually go as up as she put them and that was both literally and figuratively speaking an eye opening event for me :)

The secong most interesting thing was the lip makeup. I normally wear none or just a liiittle litlle bit of lipstick but now I wanted to try something new and wild! So we went for a bright peach color Vegas Volt (which doesn't look as wild in the picture as live):


Another thing I wanted to learn more about was contouring my face. I think I never really got the idea of it because I always had the feeling I was doing it wrong how many tutorials I ever watched! And I was right I was wrong :) First of all my brush used to be too big, I couldn't really control the areas I tried to work with it. Second: I really loved to see where the MAC's makeup artist would place which product: where's the jaw line for bronzer, where the high point for highlighter and where the perfect spot for blush.

The bronzer was perfect shade for my light skin:


This is what the result looks like :) I tried to take a photo in my friend's bathroom right afterwards:

And here with eyes closed and the lipstich already faded after having tea and eating 10 cookies at Kirsi's place :)

Aaand with a smile :D

Then I realized that the Lustre Drops combined with Soft and Gentle highlighter became very visible only after taking a picture of my head with flash. Look at that shimmer and glow! Perfect for party posing :D

The price for the makeup session was 3 products I had to buy. The decision was easy. I got a smaller face brush 188 and a fluffy eyeshadow brush 217 plus a concealer for my undereye area and occasional blemishes and somethings.
Overall I really really loved the well spent hour at MAC and will definitely do this again when I want to splurge on MAC products :) Next time I want to learn to make a better dramatic smokey eye with natural lips and cheecks.
10 Happiness Points, most of them to the awesome woman who di this to me (and I hate myself for not remembering her name) :)

Here's all the stuff she used. First she started with removing my makeup and moisturizing my face, which was interesting because honestly I had no idea that MAC also has skin care items like moisturizers. Then she primed my face with 'Face protect' primer (with SPF 50!) and applied some tinted moisturizer in color medium. Into the moisturizer she mixed Lustre drops to make the skin more glowy and a tiny bit "metallical", because this makeup was a night-life inspired look.

As eyeshadow primer she used Paintpot (don't remember the name, but it's the most natural matte one). The eyeshadows she used:
- All That Glitters
- Satin Taupe
- Black Tide.

The eye shadow part was especially interesting because she taught me how to create the openness and depth to the eyes in a way I didn't know about.First of all: I always had the wrong kind of brush for the darker colors. Second: I had always put the darker colors too low. I didn't think they'd actually go as up as she put them and that was both literally and figuratively speaking an eye opening event for me :)
The secong most interesting thing was the lip makeup. I normally wear none or just a liiittle litlle bit of lipstick but now I wanted to try something new and wild! So we went for a bright peach color Vegas Volt (which doesn't look as wild in the picture as live):


Another thing I wanted to learn more about was contouring my face. I think I never really got the idea of it because I always had the feeling I was doing it wrong how many tutorials I ever watched! And I was right I was wrong :) First of all my brush used to be too big, I couldn't really control the areas I tried to work with it. Second: I really loved to see where the MAC's makeup artist would place which product: where's the jaw line for bronzer, where the high point for highlighter and where the perfect spot for blush.

The bronzer was perfect shade for my light skin:

And then Springsheen blush was a great match for the peachy lipstick:

This is what the result looks like :) I tried to take a photo in my friend's bathroom right afterwards:

And here with eyes closed and the lipstich already faded after having tea and eating 10 cookies at Kirsi's place :)

Aaand with a smile :D

Then I realized that the Lustre Drops combined with Soft and Gentle highlighter became very visible only after taking a picture of my head with flash. Look at that shimmer and glow! Perfect for party posing :D

The price for the makeup session was 3 products I had to buy. The decision was easy. I got a smaller face brush 188 and a fluffy eyeshadow brush 217 plus a concealer for my undereye area and occasional blemishes and somethings.
Overall I really really loved the well spent hour at MAC and will definitely do this again when I want to splurge on MAC products :) Next time I want to learn to make a better dramatic smokey eye with natural lips and cheecks.
10 Happiness Points, most of them to the awesome woman who di this to me (and I hate myself for not remembering her name) :)
Subscribe to:
Posts (Atom)